Monday, October 18, 2010
Saturday, October 16, 2010
Fabulous Halloween Silhouettes
Sometimes, late at night, after I been blog hopping for hours (though it seems like just a few minutes), I discover hidden treasure! I am in love with this super smart and creative craft! I LOVE the possibilities Tammy the adorable author of She Wears Flowers has inspired in me, but what I want more than anything right now is to steal her creation!


I'M LOVIN' IT! ( I sound like a McDonald's commercial ;)
I've had this one in my mind for a while now.
I had no idea how much I was going to love it when it was done, though!
Last year, I made a bunch of these.
(I found this idea HERE.)
(I found this idea HERE.)I love, love, love silhouettes and have forever so this totally worked for me. I wanted more, though - more, more, more silhouettes. This year's idea just sprung up from last year's Halloween project. I love it when that happens!
Materials:

9 mini canvasses – 3 inches square
11 3/4 square board (1/4 inch thick)
black paint
newspaper
Mod Podge
9 silhouettes (just do a Google search--there are tons!
sponge brushes
hot glue gun
ribbon
Instructions:
{1} Cut several 3 inch long strips of newspaper. Cut 18 strips that are 3 inches x 1 inch. 

{2} Paint the board black. Be sure to cover the edges and one side completely. I used “hardboard” for this. It is a really cheap board and works perfectly for this project. 

{3} Use Mod Podge to glue the small strips of newspaper to one side of the canvas. It should cover the edge and wrap around the top of the canvas.
If the edge of the newspaper is just a little longer than the canvas, you can gently fold it in and glue it down. This works really well since the Mod Podge gets the paper “wet” and the newspaper is so thin. It will look something like this:
Repeat on the opposite side. I didn’t worry about which direction the printing was facing, but you can match it if you want to.

{4} Take the long 3 inch strips of newspaper and wrap them around the canvas from the top edge to the bottom edge covering the rest of the canvas. I just left the newspaper a little longer than both edges and glued it to the wood on the back after I trimmed it closer to the actual size.

{5} Adhere silhouettes to each canvas. I used my Silhouette paper cutter to cut vinyl for this, but I know another way to do this using your printer and no cutting.
I used to get so frustrated when people did projects with a paper/vinyl cutter because I didn't have one and I don't live in a place where vinyl products are easily accessible. So, I learned a whole bunch of tricks. Stick with me, I've got you covered!
If you do not have access to a cutting machine, you can print the silhouettes on vellum paper. Cut around the shape in a 3 inch square very precisely. You can Mod Podge the vellum right to the newsprint. The newsprint will look a little frosted when you use vellum, but it doesn’t take away from the project in any way! You can Mod Podge over the printing, but be sure your printer ink is very dry before you do this.

{6} Mod Podge over the entire thing and let dry completely. Add another coat of Mod Podge if you would like. (I always do—it just seems to work better!)
{7} Use a pencil to lightly mark where you will glue each canvas. You will place them with about 1/2 inch (a little less) between each canvas and 5/8 inch around the whole thing (like a margin). I marked where I would place each corner so I could line the whole thing up. It doesn’t show up in a picture so you’ll just have to understand what I am explaining! You could also set your center piece and line up from there just eyeballing the whole thing.
{8} Hot glue (if you want it quick like I always do) your canvasses in place. If you are worried about lining it up before the glue dries, try another glue. My other favorite glue is E-6000. Wood glue would work fine since you are gluing wood to wood and I bet Elmer’s glue would work perfectly, too. This is easy!
I love the statement this piece makes with the stark colors and the "grunge" of the newsprint.
If you would like to soften it up just a bit, add a fluffy ribbon.
You could also add a picture hanger to the back or a ribbon to hang it with.
I like the way it looks just sitting on a table easel. I'm pretty simple!
Thanks Tammy for allowing us to share your fabulous tutorial!
Labels:
Crafts,
Decorating,
Guest Posts,
Halloween,
Tutorials
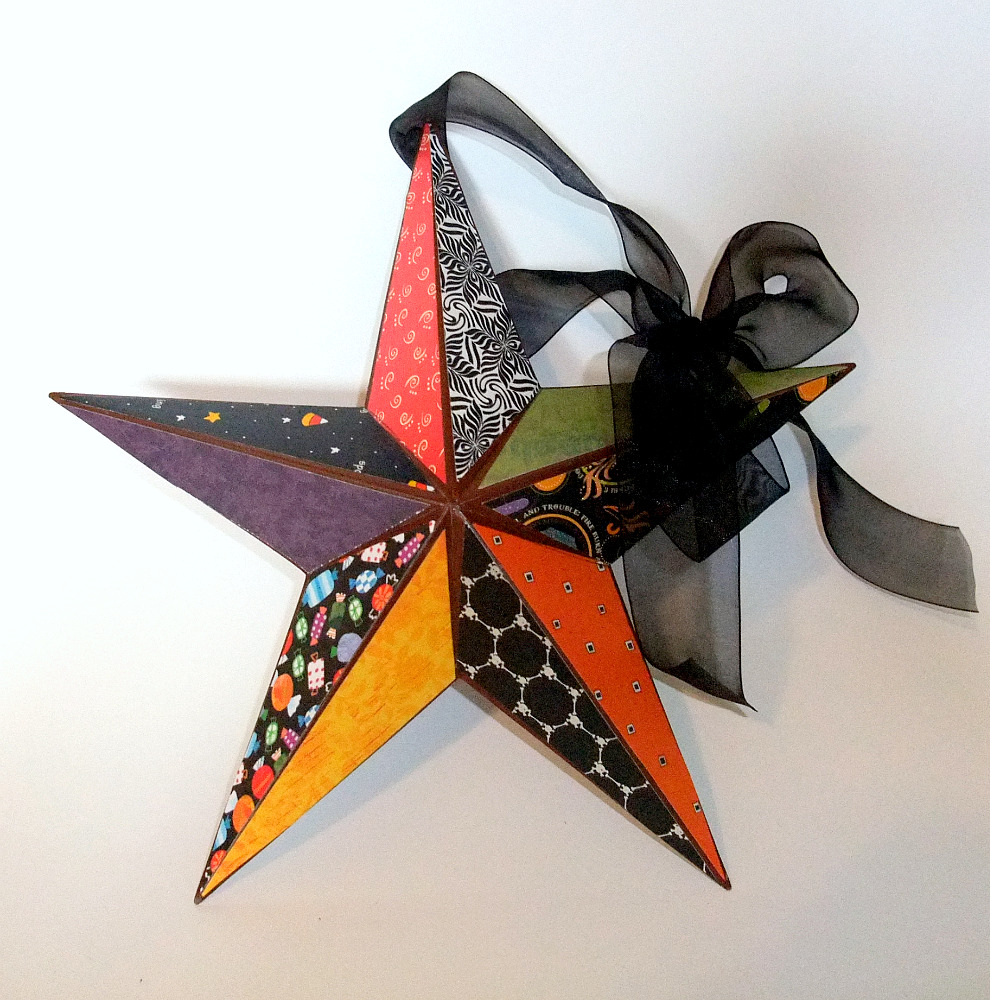
Halloween & Autumn Tin Star Decor
This is a very simple project to create.
All it takes is a little measuring ( which I will admit was not my strongest skill during this little creative moment ), some Mod Podge, a sponge brush, scissors, a tin star, ribbon, and decorative paper.
Using a ruler, measure one side of the star "spoke". By looking at the star, you can see what I mean.
Draw a template from your measurements, cut the template out, and double check it by holding it up to the star. Make sure you leave a tiny bit of the tin showing on each of the 4 side's of the spoke ( or try using a 5 x 7 piece of printing paper, fold over the spoke of the star and crease down tightly at the ridge, edges, and indent, then cut at the creases and re-measure, removing about 1/8" from all 4 sides).
Check your template measurement a 3rd time!
Now, if your satisfied with the measurements, trace the template onto a piece of cardboard & cut it out.
Choose a selection of decorative paper, anywhere from 2 differing pages to 10 papers. ( the star in the photo above has 10 different papers ). My star has 5 spokes, with 2 sides per spoke, hence the need for 10 pieces of paper. However you can make your pattern completely to your own likes!
Now this is where I kept screwing up my pattern...
Trace your template on the papers you have chosen, but ONLY TRACE 5 PIECES!
Now, FLIP YOUR TEMPLATE OVER and trace the additional 5 pieces. If you notice, the 2 sides of the spoke are opposites in measurements! ( I ended up with A LOT of extra pieces, but they are all for the same side of the spoke-lol ).
I laid out the paper pieces I had cut from my template, and placed them against the star so that I could make sure I liked the balance of the colors, patterns, etc.
Once you have that decision made, simply start Mod Podging them on - lightly coat 1 side of the spoke with Mod Podge, then center your piece of paper over it and smooth it down, removing any bubbles. I used the side of a Popsicle stick to carefully smooth the paper down. Work your way around the star following these steps. Once you have all your papers glued on, go back around the star and coat the entire surface of the star (over the paper) with another light coat of Mod Podge.
THAT'S IT!
Allow the star to dry completely, string some ribbon through the hook on the back of the star and...VOILA it's ready to hang!
I made a couple using Halloween theme paper, and a couple using fall color papers. I love them all. They are absolutely darling hanging in the center of a large grapevine wreath, or hung as a pair.
Have fun creating your own combination's-like for your daughter's bedroom, a newborns nursery...
Labels:
Crafts,
Decorating,
Fall Time,
Halloween,
Tutorials
Friday, October 15, 2010
Lovely Rolled Flowers
Stephanie for UNDER THE TABLE AND DREAMING has been a part of our blog several times. She has the most amazing idea's and crafts! We love visiting her for inspiration and dang great idea's! Here is another flower tutorial that we LOVE!!!
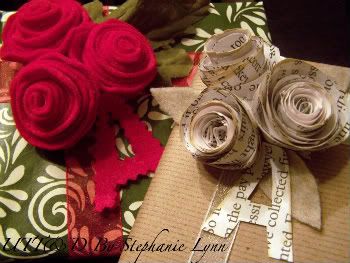
Rolled Flower Gift Toppers
Here is a quick and easy way to add a little charm to your gift packages.
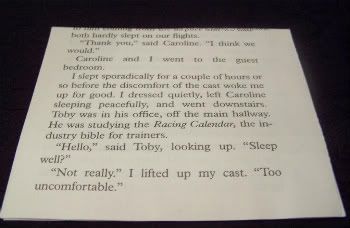
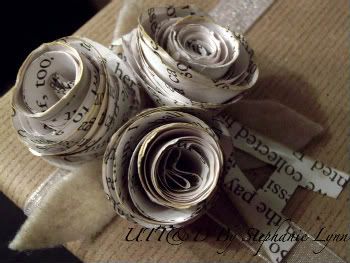
I know a lot of bloggers have extra book pages from all the fabulous paper projects floating around. Here is a way to use some of those scraps so that nothing goes to waste! You can also make these with scrapbook paper, cardstock, fabric and of course felt as shown above.
You want to start with a square shape. I used three sheets together to add a little volume. None of this has to be perfect...I promise...they will have character and charm even if you eyeball it!
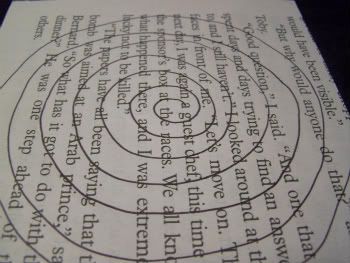
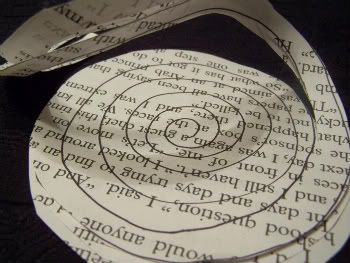
Using a pencil or a light colored pen or crayon, you want to draw a spiral circle onto the square. I used a black marker just so that it would show up in the picture.
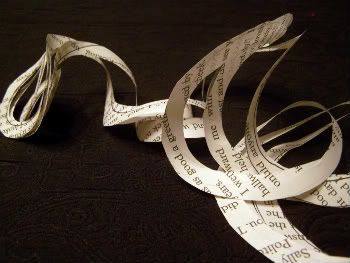
Next you want to cut out all the lines that you have drawn continuing until you come to the center of the spiral leaving a small circle at the end.
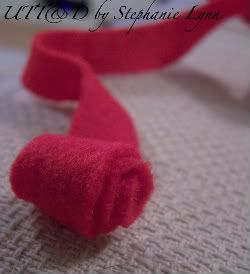
Starting with the outside of the spiral roll the paper inward in somewhat of a cone shape. You want to start off rolling tightly (which will become the center of your flower) then loosely once to get to the edges.
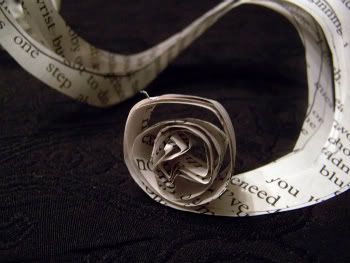
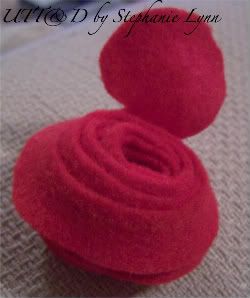
Keep rolling until you get to the end. You will want to put a dab of hot glue on the back to hold the shape. The circle that you left when cutting the spiral will finish the back. I cut it off on this paper flower to show you the roll; however you can see the circle in tact below with the felt.
I gently rubbed some Tim Holtz Distressed Ink (Antique Linen) on the edges of each flower for a worn look.
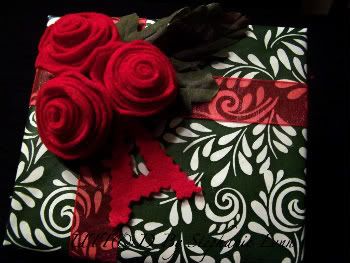
I simply attached them to the packages with a dab of hot glue and added some ribbon and hand cut felt leaves. For the tag I cut out an initial from a scrap page.
I followed the same process for the felt. It just happens to photograph better so here are some more pics!
Labels:
Crafts,
Flower Power Tutes,
Guest Posts,
Tutorials
Witching books
Jane from Mamie Jane's is a brilliant, creative, and fabulous crafter, and she has given me permission to re-post her fantastic halloween book idea's...
I would love to have these myself, and may just attempt to make them over the weekend. Thanks' so much Jane!
I'm still working on some projects for the craft show this weekend. Nothing like waiting until the last minute! Here's one of my latest projects.
Sitting in my studio was this stack of old books without their covers.
I also had some old cabinet cards that I've been wanting to alter.
So I decided to combine the two and came up with these.
The books gave me more room to add embellishments and since they stand upright they make a fun addition to a tabletop display (OK.....this isn't the best tabletop display but my kitchen table had the best light)
I also re-purposed these two wood canisters that I bought at a garage sale for 75 cents.
Before:
After:
Labels:
Crafts,
Decorating,
Guest Posts,
Halloween
Monday, October 11, 2010
Flower Pom Pom's
We love Ashley at Little Miss Momma, she is so talented and creative. We wait for her posts to go up so that we can get great inspirations! We featured one of her posts recently, and just NEED to post this one too! You will definitely be hearing more about Ashley from us-she shines in out in blog land!
Scrunch Fabric Flower Pom Pom Headband Tutorial
Ready to learn how to make your very own Flower Pom headband?!
Here's what you'll need:
About 20-30 circles cut out of the fabric of your choice {about 1.5 inch circles}
Elastic Headband {purchased at Target}
Hot glue and glue gun
Scissors
Felt
Let's get started!
Cut out one felt circle in the size you want your pom pom to be.
Take one of your fabric circles and scrunch from the middle.
Add glue to the end of the scrunched portion.
Place glue-side down on the center of the felt circle.
Continue to add the scrunched fabric circles around the center one.
...and add some more.
and some more...
and more...
Until voila! You have a full and fluffy pom pom!
Now flip over your pom and grab your elastic headband.
And glue your headband to the center of the pom.
Then apply the second felt circle on top of the headband to cover the band.
And now you have a fun pom headband!
Labels:
Crafts,
Flower Power Tutes,
Guest Posts,
Helpful Tips,
Tutorials
Subscribe to:
Posts (Atom)