Friday, December 24, 2010

MERRY CHRISTMAS!

We want to wish all of you a 
wonderful Christmas, and a fantastic New Year!

We are so grateful for the support our friends and family give to us, and we feel blessed to have you in our lives.
As you may know, this blog is named in honor of my mom Sally.  This past year has been so difficult for her, and during the Thanksgiving holiday we nearly lost her! She is improving now and working to get her strength back, and I want to thank everyone for their good wishes and prayers.

MERRY CHRISTMAS AND A BLESSED 
NEW YEAR TO ALL OF YOU!
~Love from Amber~
(update: Sally passed away on July 16th 2012)
We miss her, yet know that she is divine.

Friday, December 17, 2010

DIY Coasters


Suzy from http://joyisathome.blogspot.com has this fabulous coaster tutorial that I really want to share it with you!  What a fabulous handmade gift idea! 


DIY Coasters


I looove coasters. Maybe because I'm a freak about getting rings on our furniture. Or maybe because they're so fun to make :) When I first discovered craft blogs, I saw this idea for coasters made out of terra cotta pots over at Sweet Charli. I thought it was perfect and I had all of the stuff to make it, but I didn't get around to it until now! I thought I'd share with you my version of this project.

First, take the bottoms of terra cotta planters. Prime them with a light coat of spray primer. (They'll be really hard to spray paint if you skip this step.)
Once that dries, paint both sides with your spray paint. I used Oil Rubbed Bronze- my fav! 
Next, cut a circle of scrapbook paper to fit the inside of the coasters - around 2 inches.
Distress the edges with a distressing ink... or plain black ink if you're cheap and don't want to spend the $ on distressing ink! :) 
Put a thin layer of mod podge on the back of them, making sure not to miss anything (especially the edges!) Don't use too much or else it will all squirt out the sides and cause a huge mess.


After that layer dries, add a decent layer of mod podge to the top. Make sure to seal the edges well. After that's done, use a paper towel to clean off the massive amount of leakage.
I'm a messy crafter. What can I say. :)
Once the mod podge dries, spray the whole thing with sealer to make it waterproof.
While they're drying, cut out a strip of felt and cut 4 small circles for each coaster.
Once the coasters are dry, hot glue your dots to the bottom.
And done!! Easy peasy! Now you can use your new coasters.


IF YOU WANT TO SEE THE FINISHED COASTERS, YOU MUST CHECK OUT SUZY'S AWESOME BLOG---HERE IS THE LINK TO HER POST!
http://joyisathome.blogspot.com/2010/10/diy-coasters.html

You'll be glad you stopped by-she's brilliant!

Tuesday, December 14, 2010

Printing Vintage Images Tutorial

This is a brilliant tutorial!
I love how simple it is, and you will be SOOOOOO inspired by this idea! 
Vicki at the Rusty Rooster Vintage has a lot of fantastic idea's, tips, tutes, and more...but this one I fell in love with...


Tutorial - Your printer is not just for copy paper.

I'll try anything once...well at least when it comes to our printer!  I've run a long list of items through the printer with much success and a few scary "paper" jams.  The best items I've found to use are: cardstock, recycled paper bags, lightweight and flexible cardboard (like a recycled snack box), fabric, used dryer sheets and printed vintage pages (like dictionary or sheet music).  The results are one of a kind.  Let's get started!
FOLLOW THE LINK TO GET THE ENTIRE TUTORIAL, AND YOU WILL SPEND THE REST OF YOUR DAY MAKING THINGS!  TOO, TOO FUN!
Thanks Vicki!

Sunday, November 14, 2010

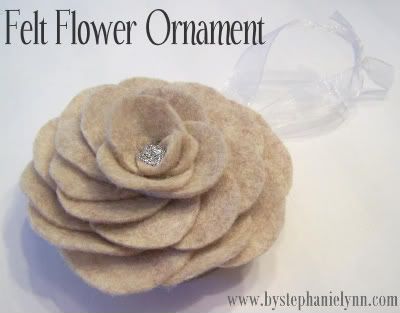
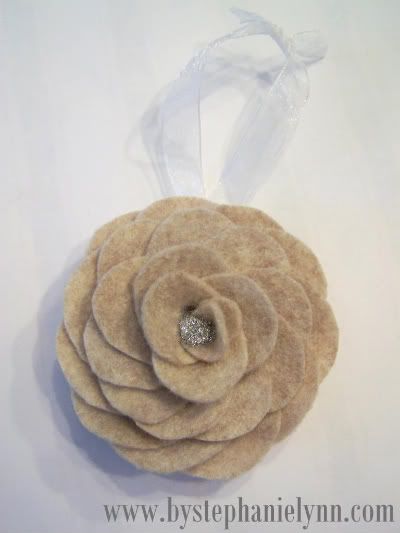
Felt Flower Ornaments

Stephanie over at Under The Table and Dreaming has been kind enough to share this fabulous flower tutorial with us.
She used the flowers to make wonderful tree ornaments, but I made several of these as hat clips and hair clips...
Thanks Stephanie!
Felt Flower Ornament 

Felt Flower Ornament

Materials Needed:Felt
Clean Metal Jar Lid
Ribbon
Embellishments {glitter}


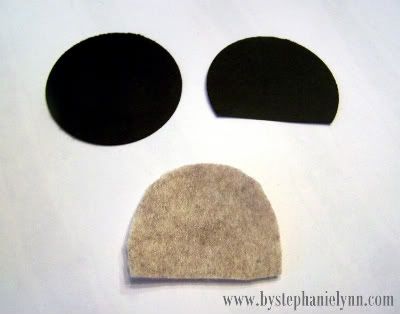
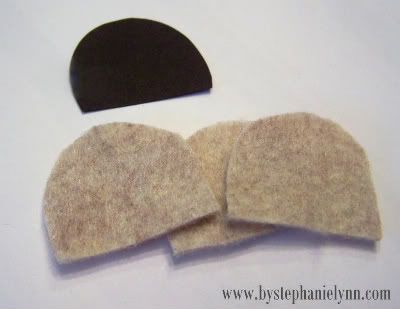
Begin by making a template for the petals. I used a 1 1/2 inch circle punch to cut a circle out of cardstock, slightly trimming off one end. {You can also hand cut a circle if you do not have a punch}

Trace your template onto a piece of felt and cut out. I needed 11 petals of this size for the 2 1/2 inch diameter lid that I used.


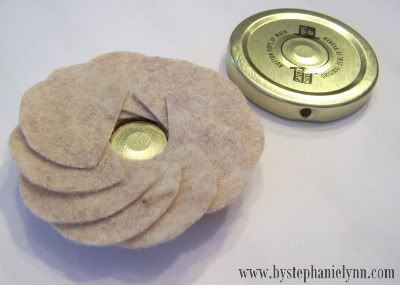
Prepare your clean jar lid by drilling a hole into the side for the hanger. Hot glue the petals around the outer edge of the lid.


Take your original cardstock template and trim a little more off the bottom, just about a 1/4 inch. Trace and cut 15 more petals of this size.


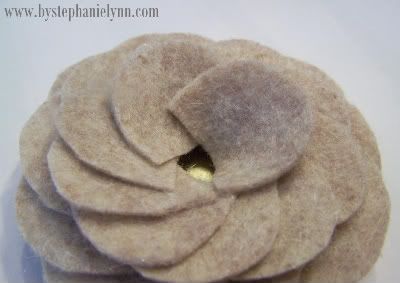
Continue hot gluing overlapping the first layer of petals.


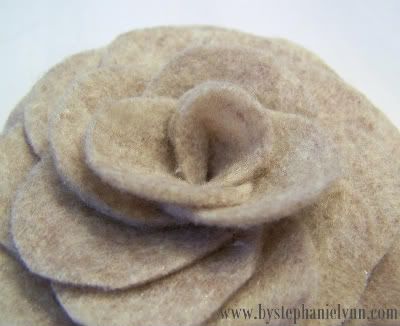
When you get to the center you will have to trim the last two petals to fit; folding and tucking them in.


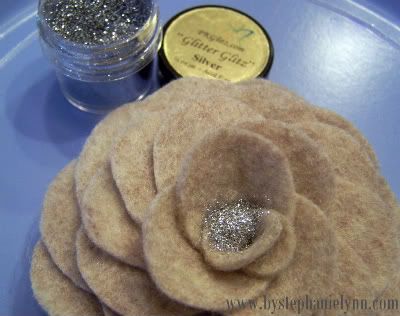
Embellish the center if you like. I place a dab of hot glue and sprinkled PK Glitter Glitz in Silver on top; Let sit to dry and dust off the access.


Finish off by threading the cut ribbon through the drilled hole for the hanger.

Thursday, November 4, 2010

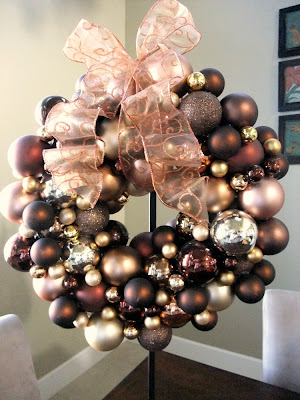
Fabulous Fall Wreath

This wreath is beautiful~if I do say so myself.
I made this wreath 2 years ago, but I really want to showcase how gorgeous it is, how well it has stored and how really simple it is to make!

The list of supplies you need:
1 white Styrofoam wreath form
(mine is an 18" wreath)
Glue gun and lots of glue
Muslin or other neutral color fabric, cut into 2" strips
 (enough fabric to be wrapped around the form-I am not sure how much I used, but it's not a ton, maybe a quarter yard...)
Christmas ornaments in assorted sizes and colors-whatever combination you like
(there are 3 dozen tiny ornaments, 2-3 doz. combined medium and large ornaments, and about 18-24 small ornaments in my wreath)
Decorative ribbon, at least 4 yards
 (more if you want your ribbon larger)

Simply start by wrapping your styro form with the strips of cloth.  I used a couple of heavy pins to secure the fabric at the beginning. Wrap tightly all the way around, and secure the end piece with either glue or more pins.
Lay your wrapped wreath form flat on a table or counter to work with. You will want to keep it flat down as you work around the edges gluing the ornaments. This way the back of your wreath will be flat and hang nicely against a wall.
Now, starting on the inside of the wreath, simply glue large and medium balls to the wreath. ALWAYS TRY TO MAKE 2 OR 3 POINTS OF CONTACT WITH THE GLUE AND EACH ORNAMENT. By this I mean, use plenty of glue to secure the 1st ornament to the form, then the next ornament will be glued to the form and also to the ornament next to it... Always remove the metal caps on the ornaments before gluing...I have learned that the ornament make come out of the cap, and fall and break, while the cap stays nicely glued in place-ugh!
Now glue more ornaments on the outer edge of the wreath, all the way around.
Start back at the center of the wreath, and simply start gluing the ornaments around the form. Use the tiny and  smaller ornaments to fill in the gaps. My wreath actually has 4 different sizes of ornament balls I used a lot of medium and small ones, with the tiny size filling in the little holes. I bought most of them at the discount store's and at Hobby Lobby.  I looked for plastic ones, and there are  lots of those in the wreath to help control breakage, and to lighten the weight. However, I love the look of the very shiny reflective balls too (as you can see in the photo's that my image keeps appearing in the reflections-ha ha) so I used lots of glass one's as well.


Let the wreath stand for a while to make sure the glue is really set and has had time to cool all the way around.  Now carefully pick up your wreath and watch for loose area's.  Re secure any of the wobbly ornaments, and then you are ready to attach the bow!
I simply wrapped a piece of ribbon around the wreath, and then tied my ribbon to the strip.


I used a pipe cleaner to wrap around the form (not the ornaments) just by wiggling in through the maze of balls, twist tied it securely together and I have a hook to hang it with!


The mantle and fireplace in my home are really high.  I mean I need a ladder to put things on the mantel, so the pictures look kind of distorted.  I was too lazy to get my ladder back out and climb up to take better pictures...sorry!
I hope you will try this wreath, it just makes such a beautiful piece in a room!
I am thinking about making a pink, white, and red one for Valentines, with some of the adorable blown glass heart ornaments that are available right now at Christmas.
I would love to see pictures of any wreaths that you make, so drop us a line or note if you do this project!
Best wishes, and happy Fall, Ya' All!

We love linking up with:
DIY Show off Fall Festival


UndertheTableandDreaming


AND WE ARE SOOOO FLATTERED! This post was featured on:

Bookmarked on the Boardwalk

Sunday, October 31, 2010

Felted Rose's

 Adding this Tutorial to my flower power collection was a must.
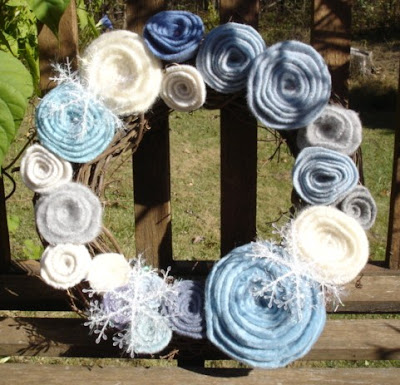
Ellen, from Ellen's Creative Passage in Columbia Missouri has a very detailed, helpful tutorial on her blog about making these flowers and a beautiful wreath that she created using the flowers.

The directions belong to Ellen, but the pictures are my efforts at making the flowers. These are definitely keepers, and I will be making more of them!
Supplies needed:  hot glue gun and glue sticks, scissors, circle patterns (I used bowls), felt (I use wool felt, but you could also use regular felt), and a marking pen
Start by making circles all over your felt...
(Amber used regular felt which is lighter weight)
Now cut out on the inside of the marked line.  You can also just free hand the circles like I do, but I thought I would show you the scientific way to do it!
Now you have your circles all cut out for each of the flowers...
I drew on this circle to show you generally how I cut mine out.  I usually do not mark each circle like this, I just free hand cut each one.  You want to start cutting at the outside of the circle and spiral in toward the center, leaving a larger circle in the center which will become the back of the rose.
 
This is what you have now...
Next pick up the outside or the pointy end of the felt
and begin rolling it up keeping the bottom flat...
keep rolling until you are close to the circle you left...
and this is what you have.  
 
Adjust the circle so that it covers the bottom of the rolled area.  You can see that I made my circle too small, so I am laying part of the cut area on the back of my rose to cover it all.
Now add some hot glue to the flat back area and attach the circle to cover the back.
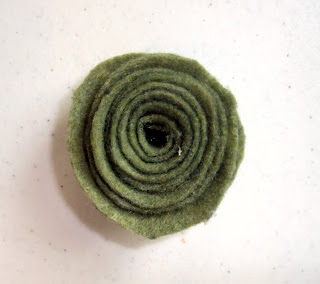
Now it actually looks like a rose...
Now trim the excess on the petals to even it out.  I don't always make it really even, because I want a more natural look (yes, even though they are blue roses!).
Now look at the edge of the bottom of  the rose.  It will probably look really uneven...
Trim off the excess with your handy dandy scissors...
Ta-Da!!  You have a finished rose!! 
Here is what I made with my 3 flowers...
 
 
And here is what Ellen made over on HER BLOG for a truly fantastic and much more detailed tutorial along with the instructions on how to make this fabulous wreath!