Showing posts with label Guest Posts. Show all posts

Thursday, September 5, 2013

Halloween Paper Bag Trees

This fun craft would be a great project for your kids on a rainy day!


Materials:
  1. Medium-size brown grocery bag
  2. Scissors
  3. Small beverage bottle
  4. Pebbles or other weights

Instructions:
Cut off and discard the bottom of a medium-size brown grocery bag. Then slit open one side so you have a rectangle. Place a small beverage bottle on the center of it.


Gather the paper around the bottle and twist it around the neck. Snip down from the top to create several strips that will become limbs. Twist them to within 3 or 4 inches from the ends.


Snip the untwisted ends, as you did in step 2, and then twist them into finer branches.


Remove the bottle and fill the trunk with pebbles or other weights.


Re-twist the trunk shut.


Tutorial source:  Disney Family Fun Magazine 

Thursday, January 13, 2011

Taking care of our senior citizens

Because this blog is dedicated to my mom Sally who is a senior citizen, when I received this email it really hit home.  I decided to share it with you... It's real food for thought...and a downer, so I promise tomorrow to post something fun and happy. Still, read this...


LETS COMPARE THE CARE OF OUR SENIOR CITIZENS WITH THE LOVELY PEOPLE WE PAY TO HOUSE IN OUR JAILS & PRISONS...


Let's put our senior citizens in jail & our criminals
 in nursing homes..
This would correct two things in one motion:
  • Seniors would have access to showers, hobbies and walks.
  • They would receive unlimited free prescriptions, dental and medical treatment, wheel chairs, etc.
  • They would receive money instead of having to pay it out.
  • They would have constant video monitoring, so they would be helped instantly if they fell or needed assistance.
  • Bedding would be washed twice a week and all clothing would be ironed and returned to them.
  • A guard would check on them every 20 minutes.
  • All meals and snacks would be brought to them 
  • They would have family visits in a suite built for that purpose. 
  • They would have access to a library, weight/fitness room, spiritual counseling, a pool and education...and free admission to in-house concerts by nationally recognized entertainment artists. 
  • Simple clothing - i.e.., shoes, slippers, pj's - and legal aid would be free, upon request. 
  • There would be private, secure rooms provided for all with an outdoor exercise yard complete with gardens. 
  • Each senior would have a computer, a  T.V., phone and radio in their room at no cost. 
  • They would receive daily phone calls. 
  • There would be a board of directors to hear any complaints and the ACLU would fight for their rights and protection. 
  • The guards would have a code of conduct to be strictly adhered to, with attorneys available, at no charge to protect the seniors and their families from abuse or neglect. 
As for the criminals : 
  • They would receive cold food. 
  • They would be left alone and unsupervised. 
  • They would receive showers once a week. 
  • They would live in tiny rooms, for which they would have to pay $5,000 per month. 
  • They would have no hope of ever getting out. 

It's so true and yet heart breaking.  Lets remember to reach out to our senior communities, remember them and honor them.  As for the criminals...

Friday, December 17, 2010

DIY Coasters


Suzy from http://joyisathome.blogspot.com has this fabulous coaster tutorial that I really want to share it with you!  What a fabulous handmade gift idea! 


DIY Coasters


I looove coasters. Maybe because I'm a freak about getting rings on our furniture. Or maybe because they're so fun to make :) When I first discovered craft blogs, I saw this idea for coasters made out of terra cotta pots over at Sweet Charli. I thought it was perfect and I had all of the stuff to make it, but I didn't get around to it until now! I thought I'd share with you my version of this project.

First, take the bottoms of terra cotta planters. Prime them with a light coat of spray primer. (They'll be really hard to spray paint if you skip this step.)
Once that dries, paint both sides with your spray paint. I used Oil Rubbed Bronze- my fav! 
Next, cut a circle of scrapbook paper to fit the inside of the coasters - around 2 inches.
Distress the edges with a distressing ink... or plain black ink if you're cheap and don't want to spend the $ on distressing ink! :) 
Put a thin layer of mod podge on the back of them, making sure not to miss anything (especially the edges!) Don't use too much or else it will all squirt out the sides and cause a huge mess.


After that layer dries, add a decent layer of mod podge to the top. Make sure to seal the edges well. After that's done, use a paper towel to clean off the massive amount of leakage.
I'm a messy crafter. What can I say. :)
Once the mod podge dries, spray the whole thing with sealer to make it waterproof.
While they're drying, cut out a strip of felt and cut 4 small circles for each coaster.
Once the coasters are dry, hot glue your dots to the bottom.
And done!! Easy peasy! Now you can use your new coasters.


IF YOU WANT TO SEE THE FINISHED COASTERS, YOU MUST CHECK OUT SUZY'S AWESOME BLOG---HERE IS THE LINK TO HER POST!
http://joyisathome.blogspot.com/2010/10/diy-coasters.html

You'll be glad you stopped by-she's brilliant!

Sunday, November 14, 2010

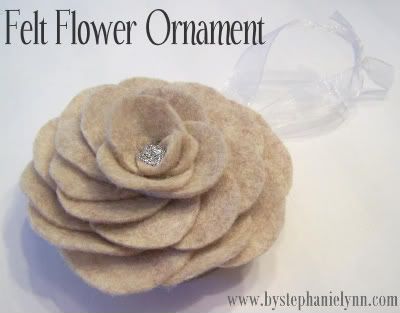
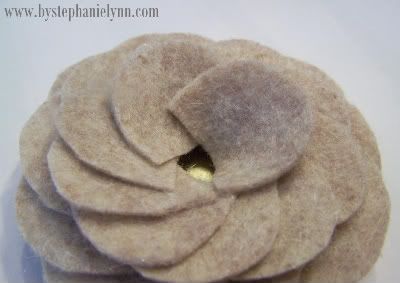
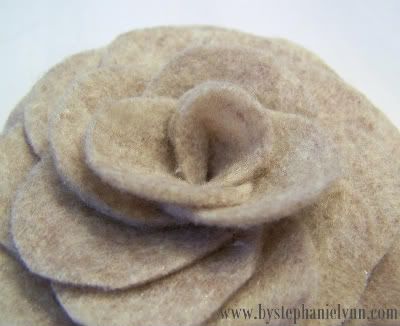
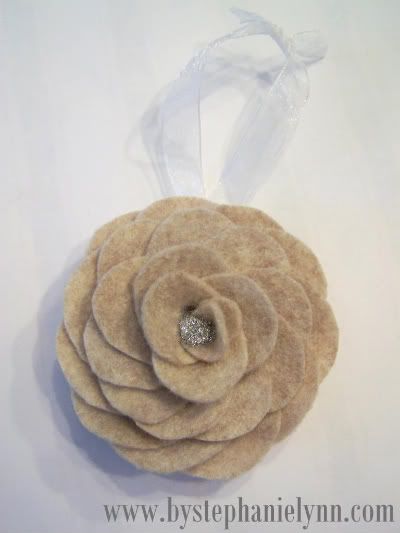
Felt Flower Ornaments

Stephanie over at Under The Table and Dreaming has been kind enough to share this fabulous flower tutorial with us.
She used the flowers to make wonderful tree ornaments, but I made several of these as hat clips and hair clips...
Thanks Stephanie!
Felt Flower Ornament 

Felt Flower Ornament

Materials Needed:Felt
Clean Metal Jar Lid
Ribbon
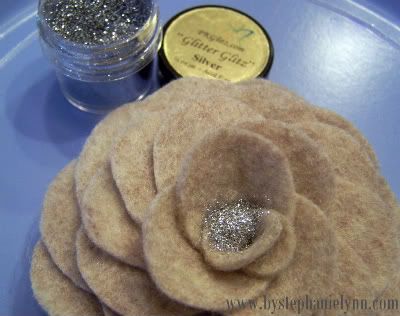
Embellishments {glitter}


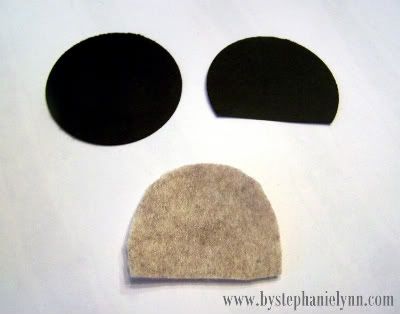
Begin by making a template for the petals. I used a 1 1/2 inch circle punch to cut a circle out of cardstock, slightly trimming off one end. {You can also hand cut a circle if you do not have a punch}

Trace your template onto a piece of felt and cut out. I needed 11 petals of this size for the 2 1/2 inch diameter lid that I used.


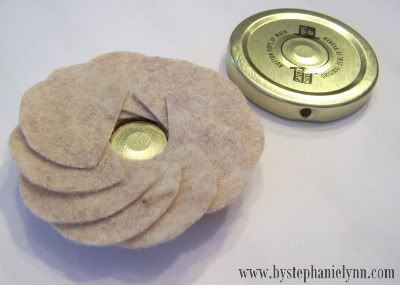
Prepare your clean jar lid by drilling a hole into the side for the hanger. Hot glue the petals around the outer edge of the lid.


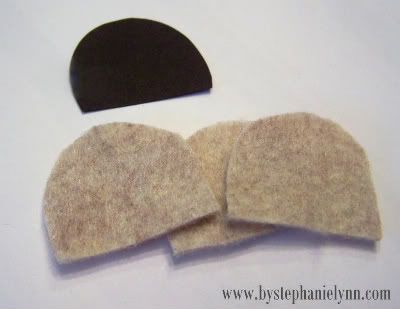
Take your original cardstock template and trim a little more off the bottom, just about a 1/4 inch. Trace and cut 15 more petals of this size.


Continue hot gluing overlapping the first layer of petals.


When you get to the center you will have to trim the last two petals to fit; folding and tucking them in.


Embellish the center if you like. I place a dab of hot glue and sprinkled PK Glitter Glitz in Silver on top; Let sit to dry and dust off the access.


Finish off by threading the cut ribbon through the drilled hole for the hanger.

Monday, October 25, 2010

Flower Pom Poms

 I have found another awesome DIY flower tutorial! There are several excellent versions of this flower floating around the blogosphere (including a different post I have here on this blog), but this is so simple and straight forward, and the pictures are excellent! We have 
to thank for this awesome post!


Pom pom 4

I've been seeing these cute flowers all over blogland/DIYland/Etsy lately. They're so fun and full, and I was dying to find out how to make them!
Then I stumbled upon the Pom Pom Flower Tutorial at A Glimpse Inside, and I could hardly wait to make one myself!
The best part of these flowers is that they are the perfect use for scrap fabric! You just need a long strip, that's all! I highly recommend you hop over to A Glimpse Inside for the full step-by-step instructions.


Pom pom 1
Pom pom 2


See? Yay for easy and fabulous!

Saturday, October 16, 2010

Fabulous Halloween Silhouettes

Sometimes, late at night, after I been blog hopping for hours (though it seems like just a few minutes), I discover hidden treasure! I am in love with this super smart and creative craft! I LOVE the possibilities Tammy the adorable author of She Wears Flowers has inspired in me, but what I want more than anything right now is to steal her creation!

I'M LOVIN' IT! ( I sound like a McDonald's commercial ;)

I've had this one in my mind for a while now.
I had no idea how much I was going to love it when it was done, though!


Last year, I made a bunch of these.(I found this idea HERE.)

I love, love, love silhouettes and have forever so this totally worked for me. I wanted more, though - more, more, more silhouettes. This year's idea just sprung up from last year's Halloween project. I love it when that happens!

Materials:Halloween Canvas1
9 mini canvasses – 3 inches square
11 3/4 square board (1/4 inch thick)
black paint
newspaper
Mod Podge
9 silhouettes (just do a Google search--there are tons!
sponge brushes
hot glue gun
ribbon

Instructions:
{1} Cut several 3 inch long strips of newspaper. Cut 18 strips that are 3 inches x 1 inch.  Halloween Canvas2
{2} Paint the board black. Be sure to cover the edges and one side completely. I used “hardboard” for this. It is a really cheap board and works perfectly for this project. Halloween Canvas8
{3} Use Mod Podge to glue the small strips of newspaper to one side of the canvas. It should cover the edge and wrap around the top of the canvas.Halloween Canvas3
If the edge of the newspaper is just a little longer than the canvas, you can gently fold it in and glue it down. This works really well since the Mod Podge gets the paper “wet” and the newspaper is so thin. It will look something like this:
Halloween Canvas5
Repeat on the opposite side. I didn’t worry about which direction the printing was facing, but you can match it if you want to.
Halloween Canvas4
{4} Take the long 3 inch strips of newspaper and wrap them around the canvas from the top edge to the bottom edge covering the rest of the canvas. I just left the newspaper a little longer than both edges and glued it to the wood on the back after I trimmed it closer to the actual size.
Halloween Canvas6
{5}  Adhere silhouettes to each canvas. I used my Silhouette paper cutter to cut vinyl for this, but I know another way to do this using your printer and no cutting.

I used to get so frustrated when people did projects with a paper/vinyl cutter because I didn't have one and I don't live in a place where vinyl products are easily accessible. So, I learned a whole bunch of tricks. Stick with me, I've got you covered!

If you do not have access to a cutting machine, you can print the silhouettes on vellum paper. Cut around the shape in a 3 inch square very precisely. You can Mod Podge the vellum right to the newsprint. The newsprint will look a little frosted when you use vellum, but it doesn’t take away from the project in any way! You can Mod Podge over the printing, but be sure your printer ink is very dry before you do this.
Halloween Canvas7
{6} Mod Podge over the entire thing and let dry completely. Add another coat of Mod Podge if you would like. (I always do—it just seems to work better!)

{7} Use a pencil to lightly mark where you will glue each canvas. You will place them with about 1/2 inch (a little less) between each canvas and 5/8 inch around the whole thing (like a margin). I marked where I would place each corner so I could line the whole thing up. It doesn’t show up in a picture so you’ll just have to understand what I am explaining! You could also set your center piece and line up from there just eyeballing the whole thing.

{8} Hot glue (if you want it quick like I always do) your canvasses in place. If you are worried about lining it up before the glue dries, try another glue. My other favorite glue is E-6000. Wood glue would work fine since you are gluing wood to wood and I bet Elmer’s glue would work perfectly, too. This is easy!

 I love the statement this piece makes with the stark colors and the "grunge" of the newsprint.


If you would like to soften it up just a bit, add a fluffy ribbon.


You could also add a picture hanger to the back or a ribbon to hang it with.
 I like the way it looks just sitting on a table easel. I'm pretty simple!
Thanks Tammy for allowing us to share your fabulous tutorial!

Friday, October 15, 2010

Lovely Rolled Flowers


  Stephanie for UNDER THE TABLE AND DREAMING has been a part of our blog several times. She has the most amazing idea's and crafts! We love visiting her for inspiration and dang great idea's! Here is another flower tutorial that we LOVE!!! 

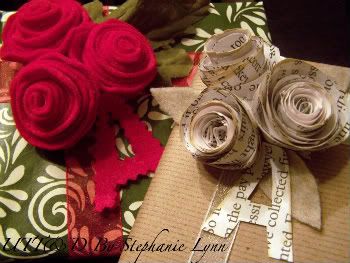
Rolled Flower Gift Toppers

Here is a quick and easy way to add a little charm to your gift packages.
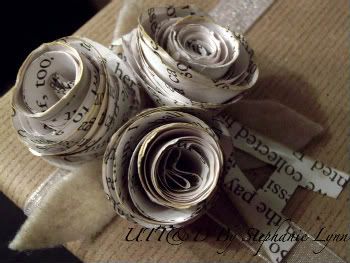
I know a lot of bloggers have extra book pages from all the fabulous paper projects floating around. Here is a way to use some of those scraps so that nothing goes to waste! You can also make these with scrapbook paper, cardstock, fabric and of course felt as shown above.
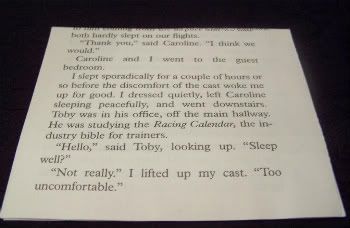
You want to start with a square shape. I used three sheets together to add a little volume. None of this has to be perfect...I promise...they will have character and charm even if you eyeball it!
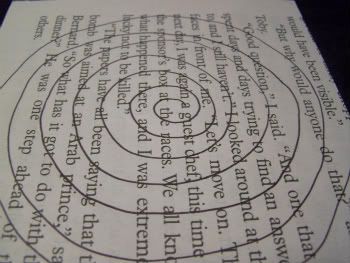
Using a pencil or a light colored pen or crayon, you want to draw a spiral circle onto the square. I used a black marker just so that it would show up in the picture.
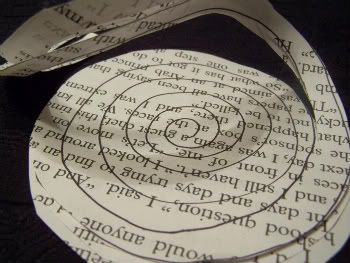
Next you want to cut out all the lines that you have drawn continuing until you come to the center of the spiral leaving a small circle at the end.
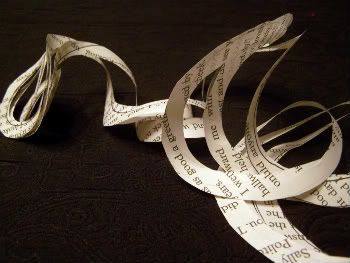
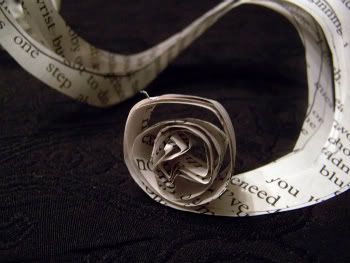
You'll be left with a long paper snake!
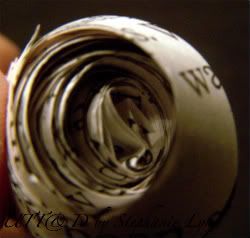
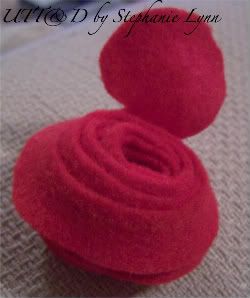
Starting with the outside of the spiral roll the paper inward in somewhat of a cone shape. You want to start off rolling tightly (which will become the center of your flower) then loosely once to get to the edges.
Keep rolling until you get to the end. You will want to put a dab of hot glue on the back to hold the shape. The circle that you left when cutting the spiral will finish the back. I cut it off on this paper flower to show you the roll; however you can see the circle in tact below with the felt.
I gently rubbed some Tim Holtz Distressed Ink (Antique Linen) on the edges of each flower for a worn look.
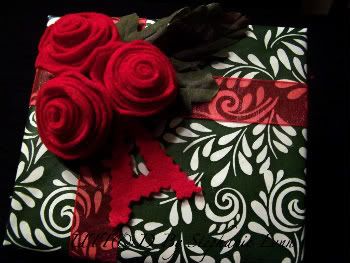
I simply attached them to the packages with a dab of hot glue and added some ribbon and hand cut felt leaves. For the tag I cut out an initial from a scrap page.
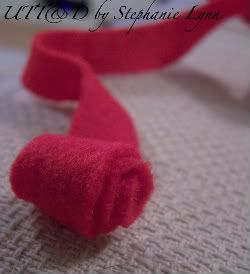
I followed the same process for the felt. It just happens to photograph better so here are some more pics!
Here is the end with the circle I was talking about. I filled the inner part of the flower with hot glue and folded over the circle for a finished look. This also helps to hold the flower together.