Friday, September 24, 2010

Ceiling Fan Make-over This is just plain cool!

Jan at Bobbiepin's Boardwalk is just awesome.  Brilliance is her middle name!
Look at this tutorial-everybody has a nasty old ceiling fan they are wishing to get rid of...

Must we sacrifice comfort for beauty?
Is the more functional piece truly considered to be "undesirable"?
Must we sweat for the sake of design style?
Is the ceiling fan truly such an eyesore?

YES, YES, YES -- I admit it, but I refuse to give up my ceiling fans, especially this one with all the little stars stuck on the popcorn ceiling with the little soccer ball fan pull.  There must be something else -- another way!!!

Ahhhh -- Much Better.  Maybe I could tone down the pulls a bit, but I always have LOVED big and dangling hoop earrings! 
I have 9 ceiling fans in my home and patio and we use them. I admit, however, that some of them just aren't too terribly attractive, so it's time to start doing some updating without spending money on new fans or light fixtures.  Here is the process I used for the fan in the guest room.

1.  I spray-painted the edges and one flat side of the fan blades white (in the event the paper wasn't thick enough to hide the brown fan blades).  I also spray-painted the shiny brass ring that attaches to the light globe (This had previously fallen off.)  While these dried, I primed and painted the fan base which was still attached to the ceiling.  I used a sponge brush and Kilz primer, followed by a white trim paint.


2.  Here are the supplies you will need to cover your blades (and the popcorn is not an option).  The wrapping paper was purchased at Target.


3.   I  applied just a small amount of Gorilla Glue to reattach the ring around the globe.


4.  Lay your fan blade on the paper, being mindful of the pattern and where it will appear on the blade.  Mark with a pen and cut with scissors.  Repeat for each fan blade.


5.  Apply a generous amount of Mod Podge to the fan blade.

6.  Attach your paper, and then apply more Mod Podge.

7.  Rub your finger over the paper to remove all air bubbles and flatten any wrinkles that have appeared.  Repeat this for each fan blade.

8.  Allow the Mod Podge to dry and then reattach the fan blades and light globe to the fixture.

9.  Attach something unique for the fan pulls.  I consider this to be the jewelry of the fan.  Some ideas would be beautiful tassels, buttons, corks, shells, beads, chandelier crystals, etc.  I used porcelain ornaments, which I mod-podged in the same paper.  The pictures makes them appear large, but they really don't look that big; and I think they add to the uniqueness of the fan.  

Another type of paper to cover your blades would be a faux grass-cloth, using either wrapping paper or wall-paper.  You could also do some stenciling or hand-painting, perhaps monogram each blade.  
Join me as we take a stand to save our ceiling fans.  Do you have any other ideas that could be used to update ceiling fans?

thank you Jan!

Monday, September 20, 2010

Ribbon Flower Corsage

I want to thank Tami over at  
(don't you just love the name of her blog?).
A simple tutorial that creates a really elegant flower, and great on your budget to boot!
And if the tutorial isn't perfect enough, Tami has divine recipes on her blog too! Check her out!

This is a super easy flower corsage that I made with ribbon that you can attach to just about anything.  You could sew it on to something or use a pin clasp (or in my case just a safety pin since I ran out of pin clasps.)  All you need is some ribbon and some hot glue!  
Excuse my rotary mat...my son decided that it needed his artistic touch a few years ago.

First cut 12 strips at 2 1/2 inches long and dab small bits of hot glue at the end of your ribbon and fold each corner over a bit.  Put a dab of glue in the center at the top and fold the top over.  Do the same for all 12 petals.
Once you have them all done cut out a small felt circle and start placing them on there with small dabs of hot glue.  I folded the ribbon back on each side too create a pleat or so (see below.)   Glue 6 of the petals on.  Now for the next layer of petals just start gluing them on in the same manner as the first layer but overlaying in between the first layer.   
For the center of the flower just take a strip of ribbon and folded it half.  Run a loose running stitch on the edge of the folded ribbon and gathered it up.  Next start rolling it up to form a bud or small flower in the center and use a needle and thread to stitch the bottom of it to secure it.  Its hard to see in the picture because of the black ribbon.  After you have made your center just apply it to the center of the petals with some hot glue and your flower corsage is ready!
 Here is the finished flower...I attached it to my purse that I made
You could also pin it to a sweater...
You could also attach it to a necklace!  I just ran the small safety pin through the chains and connected them.

ENJOY!
I just keep thinking about the endless possibilities! The colors, the uses, the sizes, the glamor, the envy of my friends...

Sunday, September 19, 2010

Fall Topiary's Tutorial

I was on a creative kick one day, and since I've been "holding on" to this idea for some time, I decided that today was the day to 'get 'er done'!
I love the colors of fall, and the beauty of the earth as it prepares to slumber until spring, so I wanted to bring a bit of that indoors...
(My tutorial is linked to It's A Blog Party Fall Get Together hop on over there for fabulous fall idea's, recipes, inspirations and more!)

*My Fall Topiary's*
 
It's a very simple project, so first gather your supplies together. You will need:
  • 1- 36" wood dowel
  • 2- Styrofoam balls, about 6" in diameter
  • 2- terracotta pots
  • Crafting foam to place inside pots
  • Assorted leaves
  • A glue Gun
  • Some moss
  • Spray paint if desired (I used oil rub bronze that I purchased at my local Lowe's store)
The first thing I did was to spray paint my terracotta pots and the wood dowel.  I then cut the dowel to measure a 12"  piece and a 16" piece.
I had a square piece of crafters foam that I purchased at the dollar store, so I simply took a kitchen knife and cut it to fit inside the 2 pots very snugly.  I then placed the Styrofoam balls on 1 end of a dowel, and then pushed the other end into the foam.  I secured that with a little hot glue.

From there it is just a matter of cutting placing your leaves on the Styrofoam balls, by either gluing them in place or by pushing the wire stems into the foam.  I did a bit of both.
Keep working until you are satisfied with the coverage of the Styrofoam, then go to work on the base.  I simply placed some glue on the Styrofoam and pressed moss onto it (be very careful doing this so that you don't burn you fingers-my lesson learned- I cut a piece from a paper plate and used it to press the moss down).

Then I added a few more leaves and tiny cat tails to the base, and I was finished!!

EASY PEASY!
It took me about an hour to assemble these (not counting spray painting/drying time), and because I had some extra leaves left over from past projects, these cost me approximately $16.00 for the set.
YAY!
 Here are a few pictures of my competed topiary's, and where I've placed them in my home.  The picture hanging above them was taken by my little brother!


UndertheTableandDreaming

Friday, September 17, 2010

Baby's Footprint Plaque Tute

Meg and I have some cute friends who are expecting new family members soon, and so we thought this would be the perfect project to give to them!  We hope all expecting girls like this!!
(And thanks to Ashley Scott for the wonderful tutorial)

Baby Footprint Plaque Tutorial
Supplies:
Wooden Plaque {@ Michael's for about $2 or less}
Your little ones foot print on scrapbook paper
Acrylic Paint {or spray paint}
Mod Podge {I used the matte finish}
Scissors
Paint brush
Sand Paper {not pictured}

STEP ONE:
Use the acrylic paint to get a footprint from your babe.
Good luck getting a decent footprint of your squirmy little bundle of joy.
I got about 20 like this before I got one that was half way decent:

Paint the edges of your plaque the color of your choice {I used black}.  No need to paint the middle of the plaque since it will be covered by the paper.

STEP TWO:
Now you have to cut the scrapbook paper with the footprint on it to be the correct size to mount on your plaque.  This is the tricky part. Because the plaque has a bevelled edge you can't easily trace the outline. 

So here is a helpful technique I have learned.  Flip over the paper with your footprint on it and place it directly onto the spot on the plaque that you want it. Now, grab a crayon and color over all the edges of the plaque.  The EXACT edge of the plaque will show up the darkest in crayon.
Now, cut out your paper along those dark crayon lines for a perfect outline.

STEP THREE:
Apply a generous amount of Mod Podge to the surface of your plaque and then place your footprint cut out on top. Smooth out all the bubbles.
Notice that the edges won't be perfect and glue may be dripping down the sides.
This is OKAY.

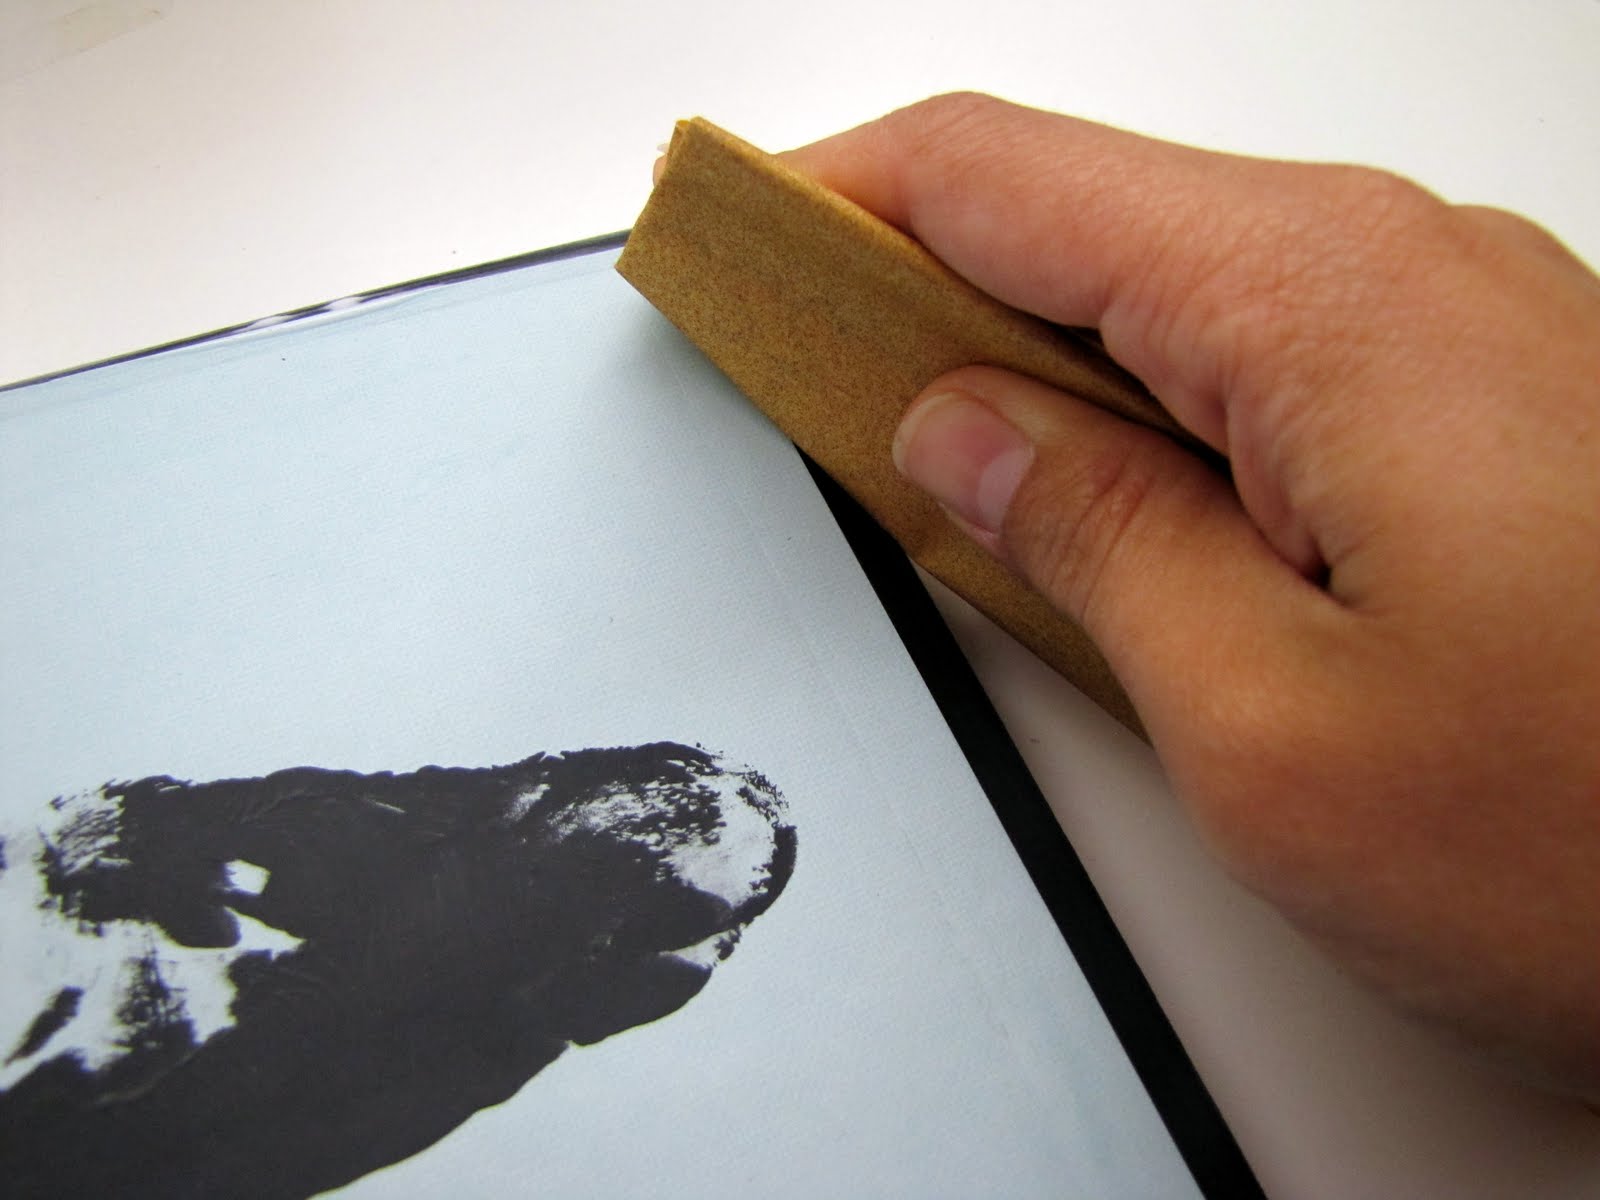
Before applying the top layer of Mod Podge take your sandpaper and sand down the rough edges of paper and dripping glue. 

I also sanded the edges of the plaque to give it a distressed look.
STEP FOUR:
Once you have finished sanding, apply the top layer of Mod Podge to the entire surface of your plaque.  Don't worry if it looks foggy and/or white from the Mod Podge--the Mod Podge will dry clear.

And here you have it:

Tuesday, September 14, 2010

5 minute Luminary!

When I saw this luminary it was instant love! It's beautiful and simple yet elegant and trendy/
It is inspiring...think of the endless possibilities-Halloween, the Thanksgiving table, Christmas parties, romantic moments. Just imagine...
Ok, now I can get on with the actual tutorial-Thank you to Jalinda for posting this creative project, We love it!


I picked up this awesome velum from Michaels.

Once I saw the swirls that was it, I had to have it!


I cut the velum to about 10" high. Then rolled up and simply stapled to keep it closed.


This velum looks great all on its own with it's foggy color, however, I added another thinner piece of velum to give it some additional color.

The second velum doesn't need to be stapled, just roll and drop inside of the first velum roll.


It's not too big of a difference just adds a hint of color.


And then I glued ribbon to the top and bottom ends. This is an extra but not necessary step. I kind of think it looks great without the ribbon, but it's nice to have that option. :)


I'd recommend to use an LED light for this luminary. But if you want a real candle, find a small candle and place inside of a glass holder to keep the flame away from the luminary.

Easy and fun!