
This is a very simple project to create.
All it takes is a little measuring ( which I will admit was not my strongest skill during this little creative moment ), some Mod Podge, a sponge brush, scissors, a tin star, ribbon, and decorative paper.
Using a ruler, measure one side of the star "spoke". By looking at the star, you can see what I mean.
Draw a template from your measurements, cut the template out, and double check it by holding it up to the star. Make sure you leave a tiny bit of the tin showing on each of the 4 side's of the spoke ( or try using a 5 x 7 piece of printing paper, fold over the spoke of the star and crease down tightly at the ridge, edges, and indent, then cut at the creases and re-measure, removing about 1/8" from all 4 sides).
Check your template measurement a 3rd time!
Now, if your satisfied with the measurements, trace the template onto a piece of cardboard & cut it out.
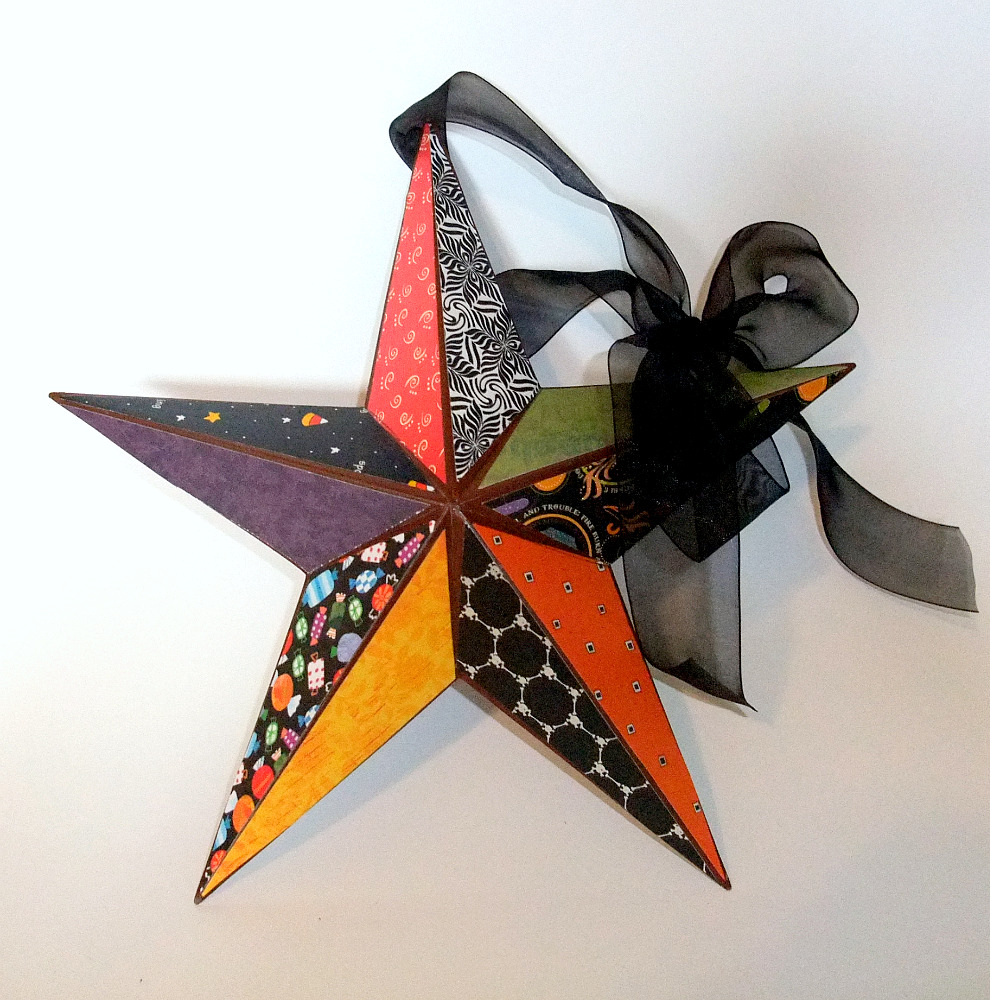
Choose a selection of decorative paper, anywhere from 2 differing pages to 10 papers. ( the star in the photo above has 10 different papers ). My star has 5 spokes, with 2 sides per spoke, hence the need for 10 pieces of paper. However you can make your pattern completely to your own likes!
Now this is where I kept screwing up my pattern...
Trace your template on the papers you have chosen, but ONLY TRACE 5 PIECES!
Now, FLIP YOUR TEMPLATE OVER and trace the additional 5 pieces. If you notice, the 2 sides of the spoke are opposites in measurements! ( I ended up with A LOT of extra pieces, but they are all for the same side of the spoke-lol ).
I laid out the paper pieces I had cut from my template, and placed them against the star so that I could make sure I liked the balance of the colors, patterns, etc.
Once you have that decision made, simply start Mod Podging them on - lightly coat 1 side of the spoke with Mod Podge, then center your piece of paper over it and smooth it down, removing any bubbles. I used the side of a Popsicle stick to carefully smooth the paper down. Work your way around the star following these steps. Once you have all your papers glued on, go back around the star and coat the entire surface of the star (over the paper) with another light coat of Mod Podge.
THAT'S IT!
Allow the star to dry completely, string some ribbon through the hook on the back of the star and...VOILA it's ready to hang!


Have fun creating your own combination's-like for your daughter's bedroom, a newborns nursery...
1 comment:
They are very pretty, lovin' all of the colors!
Post a Comment