
Stephanie for UNDER THE TABLE AND DREAMING has been a part of our blog several times. She has the most amazing idea's and crafts! We love visiting her for inspiration and dang great idea's! Here is another flower tutorial that we LOVE!!!
Rolled Flower Gift Toppers
Here is a quick and easy way to add a little charm to your gift packages.
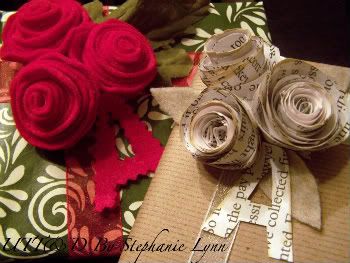 I know a lot of bloggers have extra book pages from all the fabulous paper projects floating around. Here is a way to use some of those scraps so that nothing goes to waste! You can also make these with scrapbook paper, cardstock, fabric and of course felt as shown above.
 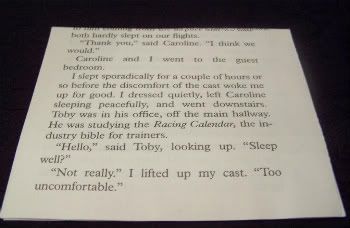 You want to start with a square shape. I used three sheets together to add a little volume. None of this has to be perfect...I promise...they will have character and charm even if you eyeball it!
  Using a pencil or a light colored pen or crayon, you want to draw a spiral circle onto the square. I used a black marker just so that it would show up in the picture.
 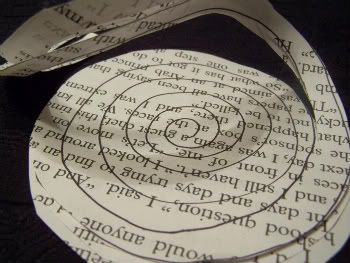 Next you want to cut out all the lines that you have drawn continuing until you come to the center of the spiral leaving a small circle at the end.
 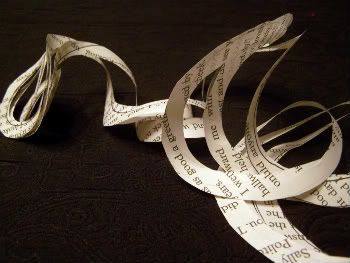 You'll be left with a long paper snake!
 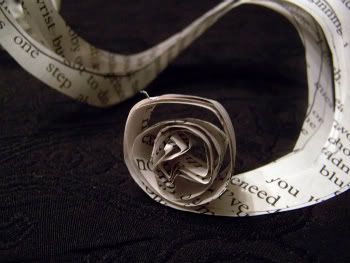 Starting with the outside of the spiral roll the paper inward in somewhat of a cone shape. You want to start off rolling tightly (which will become the center of your flower) then loosely once to get to the edges.
 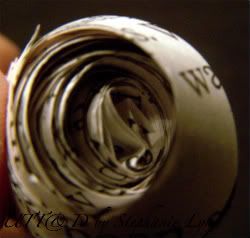 Keep rolling until you get to the end. You will want to put a dab of hot glue on the back to hold the shape. The circle that you left when cutting the spiral will finish the back. I cut it off on this paper flower to show you the roll; however you can see the circle in tact below with the felt.
 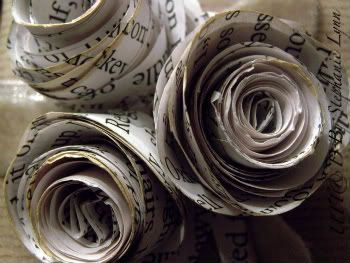 I gently rubbed some Tim Holtz Distressed Ink (Antique Linen) on the edges of each flower for a worn look.
 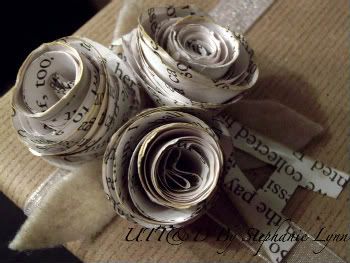 I simply attached them to the packages with a dab of hot glue and added some ribbon and hand cut felt leaves. For the tag I cut out an initial from a scrap page.
 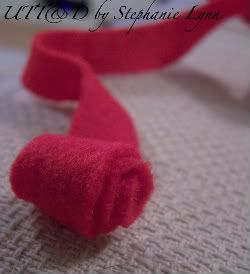 I followed the same process for the felt. It just happens to photograph better so here are some more pics!
 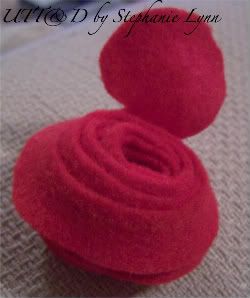 Here is the end with the circle I was talking about. I filled the inner part of the flower with hot glue and folded over the circle for a finished look. This also helps to hold the flower together.
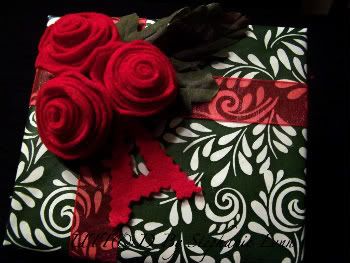
1 comment:
I love all of your blog, but you had me at book page roses! I'm a follower now! Thanks for visiting me at Wingledings, come back again soon! :-)
Post a Comment